Showing posts with label Baby Sewing. Show all posts

Tuesday, March 24, 2015

Still here! And trying to get back!


Well, Hello There!! I've been away from my blog for so long... I realize that it is time to brush off the dust bunnies and get the wheels on this thing turning once again. Albeit slower this time :)

During the time I was awol did get a bunch of sewing done, just lacked the inclination to document things as I went. I'll try to pick it up, and in the following days will try to put up pictures of things that I made! To get things started, here is a growth-chart I made for my little one -


As she grows, I jot down her numbers (age, weight, height) on these key chain tags and tack them on. Though I wonder at what time it will be "not-okay" for me to publicly document her weight ;)

At the top I added a snap and used a bangle to hang it.


The fabric is printed cotton from IKEA, backed with white muslin cotton.  I used regular polyester felt to cut out numbers that I roughly drafted, and sewed them on using contrasting thread.


And the inch/foot markings I made using the "reinforced stitch" on my machine (it basically goes up-down-up for each stitch, so that each stitch is 3 times over!)

We tried hanging it up, but you know what happens when a toddler spies something colorful on the wall that she can reach?

So for now, this growth chart is neatly folded up and put away in a pouch!


Thursday, June 13, 2013

One post for pillows... really!

One of my class mates in engineering school used to call me Golu - meaning round. That's because I have a round face, a round head, large round eyes and I used to wear round-ish spectacles. Now funny as this picture of me in the tenth grade may be, a lot of effort went into making sure that my head stayed round :)  My mum made a mustard seed pillow (most kids in India have one) and made sure that my round head rested only on that :) Mustard seeds are a poor man's beans (the ones that go in bean bags, no snickering!) they roll around and don't apply any pressure on the baby's head. So needless to say, my beanette gets one too. This is a ~7x10 inch flannel rectangle filled with mustard seeds, with a pretty cover on top!


And since one pillow isn't enough, here is another one, fiberfill stuffed. This is for later, when the soft skull bones are no longer at the risk of getting flattened.

That's my short & sweet post on baby pillows! 

Tuesday, June 11, 2013

More Crib Decor!

Would you call me a broken record if I ventured to say (yet again) that baby-making is exhausting?! I mean, I've been really good through out my pregnancy and have had a really good handle on mood swings, eating right etc. so I think I should be allowed to complain about how I've been constantly tired these last few weeks :)

Well, I *think* I am done decorating my baby girl's crib - I made a few things to hang here and there. I only have pictures of finished items to share with you, no 'in progress' pictures - I felt just way too disinclined to get off my tired butt and click some.

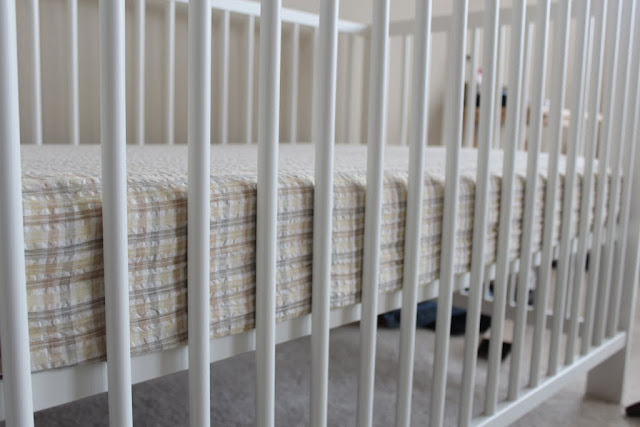
First up is the crib skirt I put together. We're big on co-sleeping, so we got the basic Gulliver crib from Ikea. You'll see that the short sides sides don't have any room between the base and the sides, so the shorter panels would be ~23.5 inches, not the whole length of the side.

Then instead of tacking on the panels using velcro/etc, I sewed them at the corners.

I like how the skirt hangs, I think I'll make another when time permits, maybe a frilly/floral/girly print.

Next up is this embellishment with flowers & butterflies that I wanted to make the moment I saw it (when you click on the link, you be asked to sign up, the account is free and they do have some good patterns to offer). I found the instructions a little wanting in detail and had a few hiccups making my first butterfly. But I figured it out, and it is simple. For now I've packed it in my hospital bag, I want to use it to decorate the bassinet so it is a little less industrial-looking.


I also made a few "half sheets" which basically are seamed flannel rectangles with ties. When she does start sleeping in the crib, alternately layered waterproof pads and half sheets will make middle-of-the-night changes easy - no wrestling with the mattress to get that elastic on.

The one last thing in progress is a crocheted mobile. I've ordered one of these arms from amazon, should be here in a day or two, and I hope to be able to share that with y'all soon!

Thursday, May 2, 2013

Bedding & Bibs

Not a lot going on lately, fatigue and my inability to sleep through the night has caught up! An old wive's tale states that if you're having a baby girl, she makes you drowsy. I think having a baby makes you drowsy :)

Anyway, my guilt caught up with me as well. Well not exactly guilt, but more of an itch - things that I wanted to make that were still not made!! So I smartly took on easy projects and knocked out a few, hehehe!!

I made a self binding blanket - white chenille paired with the purple chevron flannel that I found in the red-tag aisle. This was really quick. But I did learn that the chenille stretched a bit cross-wise so pin closely along that edge the next time.


Then there is this crib sheet, seersucker in hush tones, because bedding should not stimulate the child. Some more crib sheets and "half-sheets" are on my to-do.


And some bibs. or Baprons :)
I like that name - bapron!
You've seen all these fabrics before. I just can't throw away fabric - no matter how small the scrap. Its a sickness, really! So its not a bad thing that they come together quite well for small items like these -

The one thing I modified from the tute was that I used snaps instead of ties. Uses less tape, and won't tangle up in the dryer. To get an idea of how large the neck opening should be, I used the bib the nephew forgot to pack :)

I'd never used snaps before, so this was a learning experience. The pliers that I splurged on proved pretty useless - the two pieces never aligned and I wasted two sets! Then resorted to this method except I used an old empty spool and a mallet. Then it was easy, and I must say, I like snaps!! I got to get me some of those kam snaps every one talks so fondly of.

Those were my exploits over the last few weeks!
Now the hubs and I are counting down weeks. 2 weeks and the sister will be here, yayyy!! 2 weeks after that, my mum! yayy yayyy! And two weeks after that... yayy yayy yayy!! But as they say the EDD is the "expected" date, there is nothing certain about it!

Ohmigosh!! There's so much more I want to make before the baby gets here!... get to it girl!!

Saturday, March 23, 2013

Slip Cover


I made a slipcover of the same purple flannel that you saw in this recent post, mainly because I had just enough left for one slipcover. A few scraps are all I have left of it!


Slipcover V1.0 had the zipper on top, as in the video I pointed to in this post, and it took a little lot of wrestling to get the cover onto the pillow. So I called that the Beta version, fixed the bug and re-did the zipper and placed it on the curved side, this way the cover slides on easily. Slipcover 2.0 :)


And cover #2 with the cute girl silhouettes got a random splatter of green & pink buttons on an improvised closure mainly dictated by the amount of fabric I had! I think I did a pretty good job of lining up the prints where I had to join leftovers.


So there you have it, two slip covers on an oversized boppy pillow, all for less than twenty bucks (I got the polyfill at 50% off, the fabrics were all remnants/purchased on sale). 

Thursday, March 14, 2013

Kimono tops

I set up a mini assembly line today, and just finished making a these kimono tops -


These are great scrap busters! As little as 13 inches of fabric does it, so I guess I'll be raiding the remnant bin again soon!

One of the two identical whites is for my friend's baby girl :)

Saturday, March 9, 2013

Itty bitty V2.0

More itty-bitty dresses, lined with light white cotton this time. Made two of a kind, one for me and one for a friend who recently had a baby girl! It was the perfect project for a remnant I picked up at Joanns, a tiny rectangle is all there is left of it now.


This one got two flowers and some piping for embellishment -

And this one, two cute smileys. As the baby grows, that button can simply be moved up so the dress continues to fit her till she outgrows the bodice.

Tuesday, March 5, 2013

Be..bop...boppeee

You need something, you google it, and voila!
The blog-land has had generations of smart & thrifty citizens inhabit it before I was born into it, so I always find what I'm looking for.

This time around, I wanted to make myself a nursing pillow, and found one of the clearest set of instructions here. When I downloaded the pattern, I felt there's no way this pillow is going to fit around my waist after I've delivered (now, I don't speak from experience, but I've read plenty of real momma posts that say that I'm going to have the girth of five months along for about a month after I've delivered). So I knew I had to re-size the pattern.

Given that the Boppy is basically a blown up travel pillow, I knew it wouldn't be rocket science and went about trying it out.

I started with the downloaded pattern for reference, and made changes. You can see that the drawing on the right allows a bigger waist to fit in :)


I also added two inches to the center of the "C" where the baby will rest - only faintly visible in the picture above.

For the pillow form fabric I debated between white quilting cotton and thick IKEA cotton from my stash, and settled on the IKEA fabric because it is almost as thick and sturdy as denim so would make for a stable pillow form.

Sewing it was simple - cut two pieces on the fold, pin 'em right sides together and sew them with a 1/2 inch seam, leaving a 6-7 inch opening to turn it out and stuff.

Stuffing it firmly took about 25oz of fiberfill. I left my opening on the side (not on top as instructed in the video) because the center of the pillow is where the baby rests, so it should be the firmest part. And I felt that I could not have stuffed it as firmly if that's where the opening would have been.


I like that the pillow does not look naked without a slip cover on it, but I do plan to make two slip covers, I am thinking flannel. With all the to-dos on my list, lets see when I get to it :)

In the mean time, the fabric cut out of the "C" is begging to be made into a zippered pouch. I mean, it is the perfect size!! I'm going to get straight to it!
You may also like -